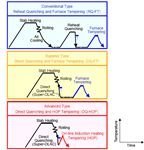
- Heat treatment is the heating and cooling of metals to change their physical and mechanical properties, without letting it change its shape. Heat treatment could be said to be a method for strengthening materials but could also be used to alter some mechanical properties such as improving formability, machining, etc. The most common application is metallurgical but heat treatment can also be used in manufacture of glass, aluminum, steel and many more materials. The process of heat treatment involves the use of heating or cooling, usually to extreme temperatures to achieve the wanted result. It is very important manufacturing processes that can not only help manufacturing process but can also improve product, its performance, and its characteristics in many ways.
Hardening
Hardening involves heating of steel, keeping it at an appropriate temperature until all pearlite is transformed into austenite, and then quenching it rapidly in water or oil. The temperature at which austentizing rapidly takes place depends upon the carbon content in the steel used. The heating time should be increased ensuring that the core will also be fully transformed into austenite. The microstructure of a hardened steel part is ferrite, martensite, or cementite.TemperingTempering involves heating steel that has been quenched and hardened for an adequate period of time so that the metal can be equilibrated. The hardness and strength obtained depend upon the temperature at which tempering is carried out. Higher temperatures will result into high ductility, but low strength and hardness. Low tempering temperatures will produce low ductility, but high strength and hardness. In practice, appropriate tempering temperatures are selected that will produce the desired level of hardness and strength. This operation is performed on all carbon steels that have been hardened, in order to reduce their brittleness, so that they can be used effectively in desired applications.
AnnealingAnnealing involves treating steel up to a high temperature, and then cooling it very slowly to room temperature, so that the resulting microstructure will possess high ductility and toughness, but low hardness. Annealing is performed by heating a component to the appropriate temperature, soaking it at that temperature, and then shutting off the furnace while the piece is in it. Steel is annealed before being processed by cold forming, to reduce the requirements of load and energy, and to enable the metal to undergo large strains without failure.- NormalizingNormalizing involves heating steel, and then keeping it at that temperature for a period of time, and then cooling it in air. The resulting microstructure is a mixture of ferrite and cementite which has a higher strength and hardness, but lower ductility. Normalizing is performed on structures and structural components that will be subjected to machining, because it improves the machinability of carbon steels.Carburization
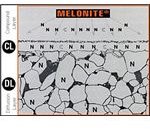
- solid, or gaseous material which decomposes so as to release carbon when heated to the temperature used. The outer case or surface will have higher carbon content than the primary material. When the steel or iron is rapidly cooled by quenching, the higher carbon content on the outer surface becomes hard, while the core remains tough and soft.Surface HardeningIn many engineering applications, it is necessary to have the surface of the component hard enough to resist wear and erosion, while maintaining ductility and toughness, to withstand impact and shock loading. This can be achieved by local austentitizing and quenching, and diffusion of hardening elements like carbon or nitrogen into the surface. Processes involved for this purpose are known as flame hardening, induction hardening, nitriding and carbonitriding.
GD&T Symbols List Flatness Flatness GD&T Flatness is a common symbol that references how flat a surface is regardless of any other datum’s or features. It comes in useful if a feature is to be defined on a drawing that needs to be uniformly flat without tightening any other dimensions on the drawing. The flatness tolerance references two parallel planes (parallel to the surface that it is called out on) that define a zone where the entire reference surface must lie. Straightness Straightness actually has two very different functions in GD&T depending how it is called out. In its normal form or Surface Straightness, is a tolerance that controls the form of a line somewhere on the surface or the feature. Axis Straightness is a tolerance that controls how much curve is allowed in the part’s axis. This is usually called out with an included call to maximum material condition. Both callouts are very different from ea...


Comments
Post a Comment